| 1. |
Open
Outlook Express on your computer |
| 2. |
Go
Tools,
Accounts |
|
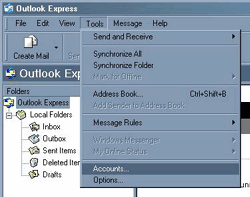
(If
you've never set up an account before, the Wizzard will take
you straight to step 4) |
| 3. |
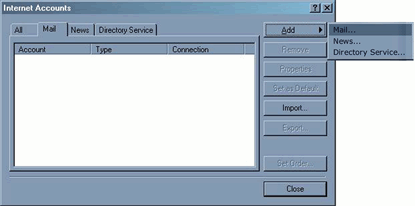
Click
on the Mail tab, then Add,
Mail |
|
 |
| 4. |
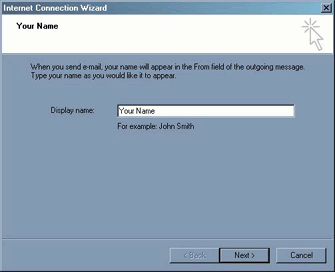
Type
your Name (or what you want
displayed, usually your full name) in the field, click
Next |
|
 |
| 5. |
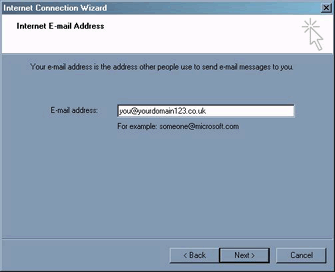
Type
your Email Address in the
field, click Next |
|
 |
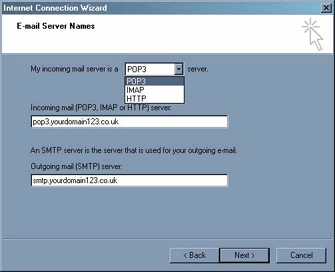
| 6. |
Next
to 'My incoming mail server is a' choose POP3
Incoming mail is pop3.yourdomain
(so if your email address is [email protected] your incoming
mail is pop3.worldzone.co.uk)
Outgoing mail is smtp.yourdomain
(so if your email address is [email protected] your incoming
mail is smtp.worldzone.co.uk)
Click Next |
|
 |
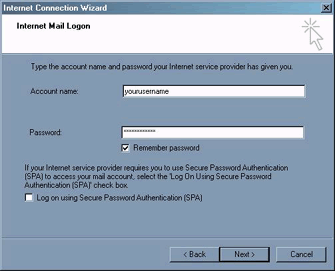
| 7. |
Type
in your Account/User Name
and Password, click Next |
|
 |
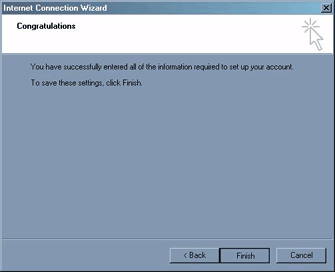
| 8. |
Click
Finish |
|
 |
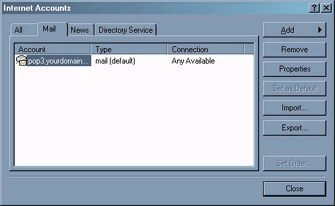
| 9. |
Under
the Mail tab, double click
your new account |
|
 |
| 10. |
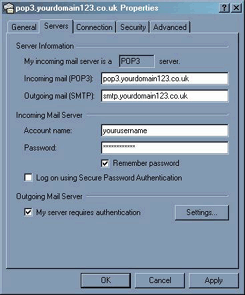
Under
the Servers tab, check the
box next to My server requires authenication,
next to it click Settings |
|
 |
| 11. |
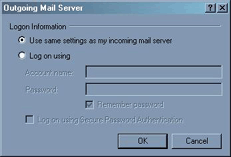
Select
Use same settings as my incoming mail
server |
|
 |
| 12. |
Click
OK, then close the window |